Car Set Screen
The Car Sets screen has a number of tabs at the top of the screen, with something of a natural order to them. In the first, you enter the teams and drivers, on the second tab you set their performance, on the third you paint the cars and pit crews. On the fourth tab you paint the drivers' helmets, and on the final tab you edit the points system.
At the top you find buttons for loading and saving car sets, and importing and exporting data.
When you open a car set file, you can choose either ArgEditor files (.arged) or old F1ed files (.1ed).
When saving, you can save either an ArgEditor car set file, or a F1Ed file that can be read by F1Ed.
Game settings such as player horsepower, general grip level and weather settings are not saved in ArgEditor car set files, but are saved in F1Ed files.
Teams and Drivers tab
This is where you enter team names and their engines, one or two drivers for each team. You must also set a number for the driver, where the numbers available range from 1 to 40.
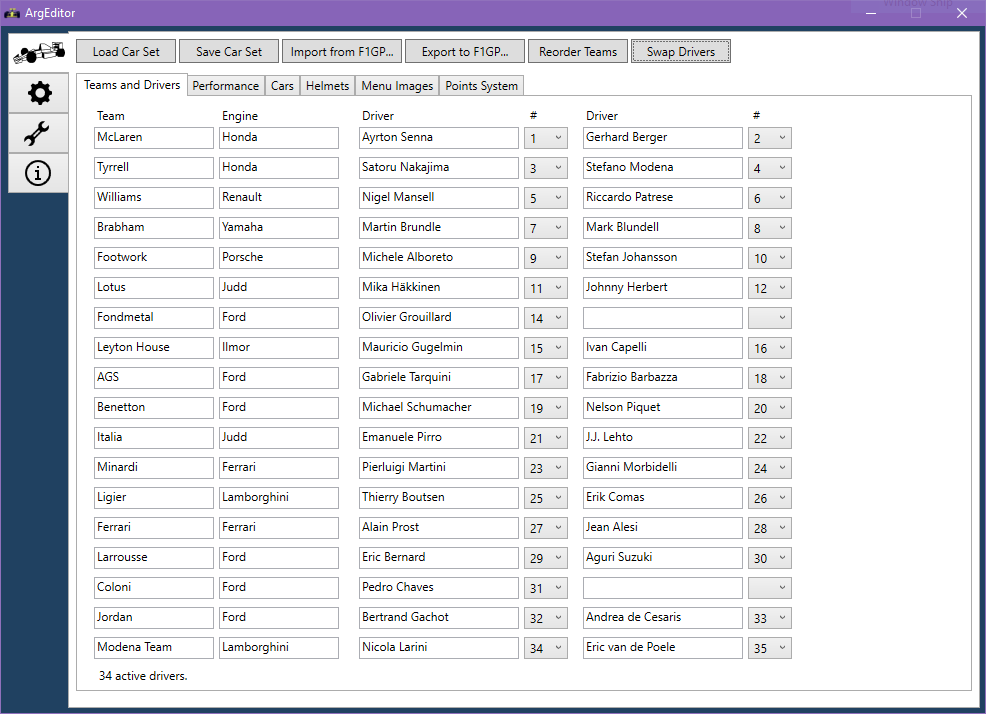
There must be at least 26 active drivers. Two drivers cannot have the same numbers. Active drivers are those that have a number set. If you have enabled a driver by giving them a number, you can disable them again by selecting the empty value at the top of the driver number list.
If you set the same number for two or more drivers, a red marker will appear next to the driver number dropdowns for the affected drivers.
A driver's name can be 23 characters long, but may appear cut off in-game if it is longer than 18 characters, depending on the width of the characters. Team and engine names can be 12 characters long.
If you give a driver a number, but do not set a name, an orange marker will appear next to the driver number dropdown for the affected driver.
Note that the first team in the list has different panel shapes compared to the other teams. This is because the first team in 1991 was McLaren, which had the well-known Marlboro paint scheme with a red diagonal stripe across the nose cone.
By clicking "Reorder Teams", a new dialog appears.
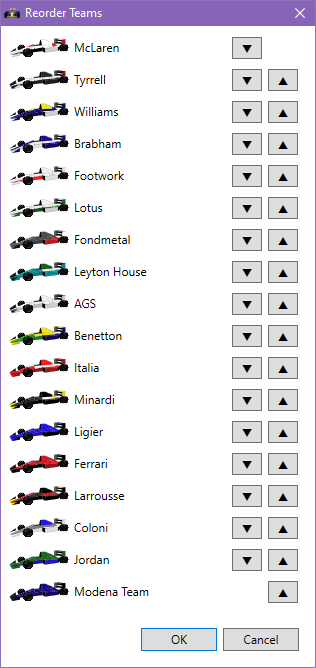
This window allows you to reorder the teams using the arrow buttons on the right.
When moving a team, it will move all the team data to the new location, including the drivers and all their data as well.
By clicking "Swap Drivers" you can swap two drivers between teams.

Select the two drivers that you wish to swap in the dropdown lists and click OK.
This will swap the drivers around completely (including helmets and menu images) but the number will remain the same.
Performance tab
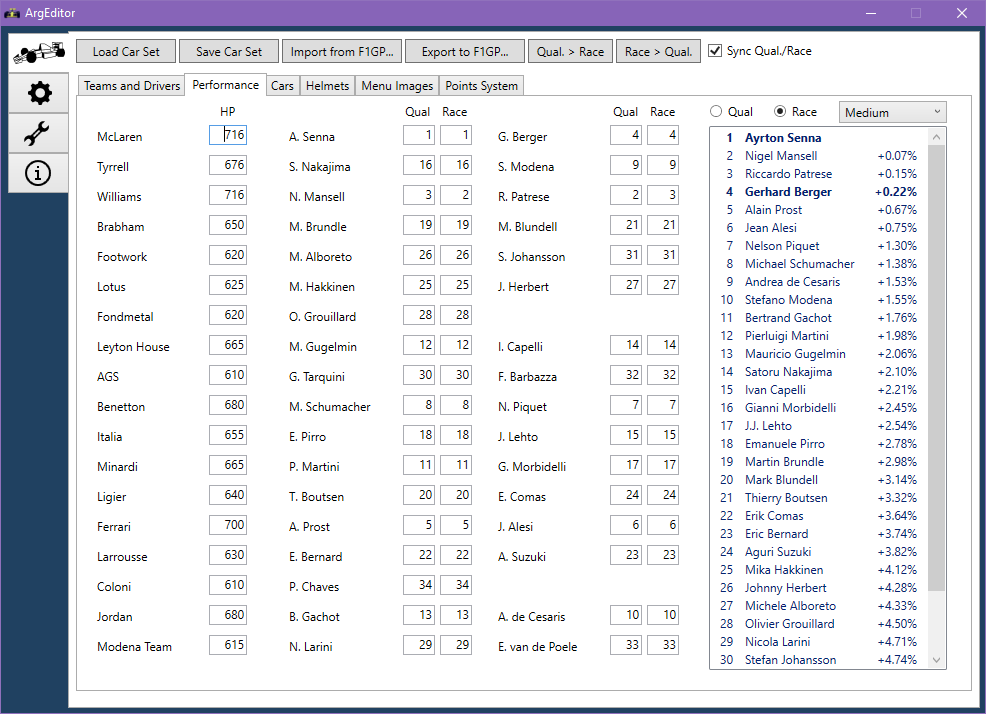
Each team has a horsepower value (HP) which determines how fast the cars will be in a straight line, where higher is better.
Drivers have two performance levels, one for qualifying and one for the race. A lower value means better performance level, so think of the value you are setting as a "penalty" that slows the driver down.
Apart from entering a numerical value with the keyboard, you can also use the + and - keys to increase/decrease the values. If you hold down the Shift key, values will increase/decrease by 10.
If the "Sync Qual./Race" checkbox at the top is checked, editing a qualifying performance value will update the driver's race performance value, and vice versa. You can keep this checked during initial editing, and then uncheck it for final adjustments.
The "Qual. > Race" and "Race > Qual." buttons can be used to quickly transfer all performance values from one of the categories to the other.
On the right you will see a rough estimate of how drivers will perform relative to each other. When you are editing a driver, they will be displayed in bold text in the list. When you edit a team, both the team's drivers will appear in bold.
You can toggle between the Qual(ifying) and Race performance values, and choose if you want to see the estimated performance for slow, medium or fast tracks.
At high speed tracks like Hockenheim and Monza, the horsepower value will have a much greater effect on the lap times. At the opposite end of the spectrum, lap times at Monte Carlo and Phoenix will be much more influenced by the performance level of the drivers. Medium speeds tracks are somewhere in the middle, like Mexico City and Estoril.
The relative performance is calculated using a formula developed by Hrvoje Štimac, Ivanhoe Vasiljevich and René Smit for the LapCalc tool.
Suitable values
In F1GP, teams have horsepower values ranging from 716 at the top to 610 at the bottom, and drivers have their performance levels in order, from 1 at the top to 34 at the bottom. This is not necessary however, any number of drivers can have the same performance level values.
Performance levels can be set as high as 255, but then the driver will just trundle along the track, sliding like a drift racer. I would not recommend going above 50.
Performance levels and qualifying sessions
A thing to note is that when you completely skip the qualifying session in F1GP, the grid that the game sets up for you is only based on the horsepower value of the car, and not at all by the driver performance level. Therefore, skipping the qualifying session will remove any performance differences you have set between team-mates.
Cars tab
This is where you paint cars and pit crews.
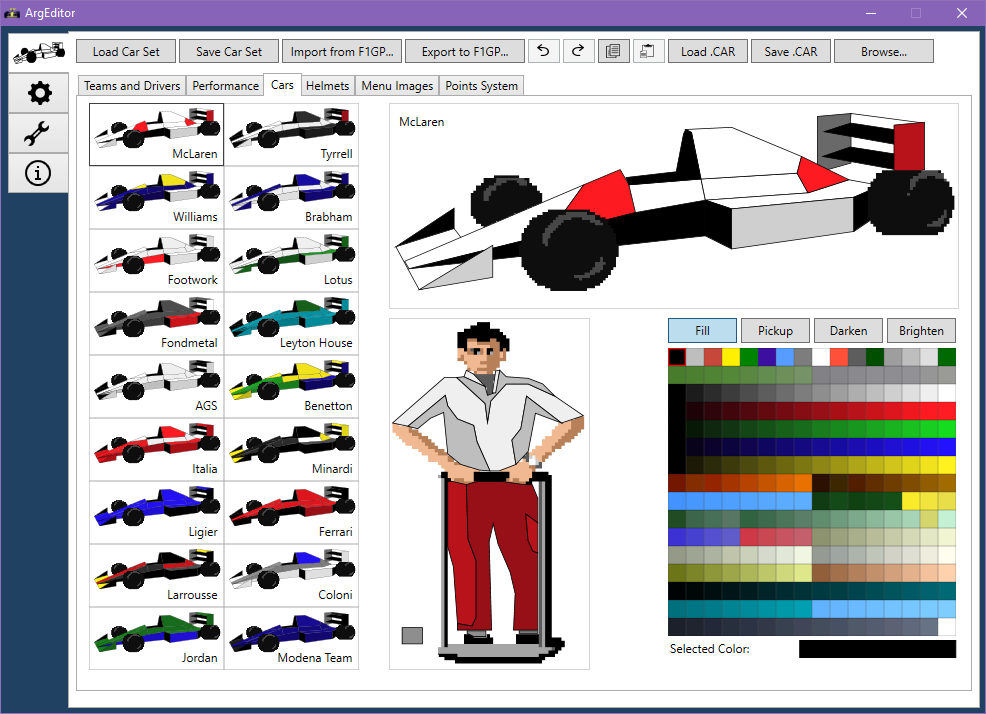
Click on a car in the left part of the screen to paint it. Painting is done by using the palette tools, which allow you to paint panels, select the color of an existing panel, and darken or brighten a panel.
The same applies for painting the pit crew. To help you paint the socks, which have a very small area in the preview box, you can click on the little square to the left.
As noted above in the Teams and Drivers section, the first car - McLaren in the default game - has a slightly different panel layout on the nose.
You can undo a painting action with Ctrl+Z and redo actions with Ctrl+Y.
By right-clicking on a car in the menu on the left, a context menu appears. It has three actions:
- Copy, which copies the selected car to the clipboard
- Paste, which pastes a car from the clipboard to the selected position
- Load .CAR File, which allows you to load a .CAR file from disk to update the selected car
- Save .CAR File, which allows you to save a .CAR file to disk containing the selected car's colors
These options are also available for the currently selected car in the toolbar above the tab.
To quickly choose car colors or pit crew colors from an existing ArgEditor car set file, F1GP .EXE file, old F1Ed car set file (.1ED) or from a single .CAR file, you can click the "Browse..." button at the top. A new window will appear. By clicking the "Browse..." button in the new window, you can choose an existing car set, EXE file, 1ED file or CAR file to read existing car colors and pit crew colors from.
Once you have chosen a file, each car and pit crew found in the file will be displayed.
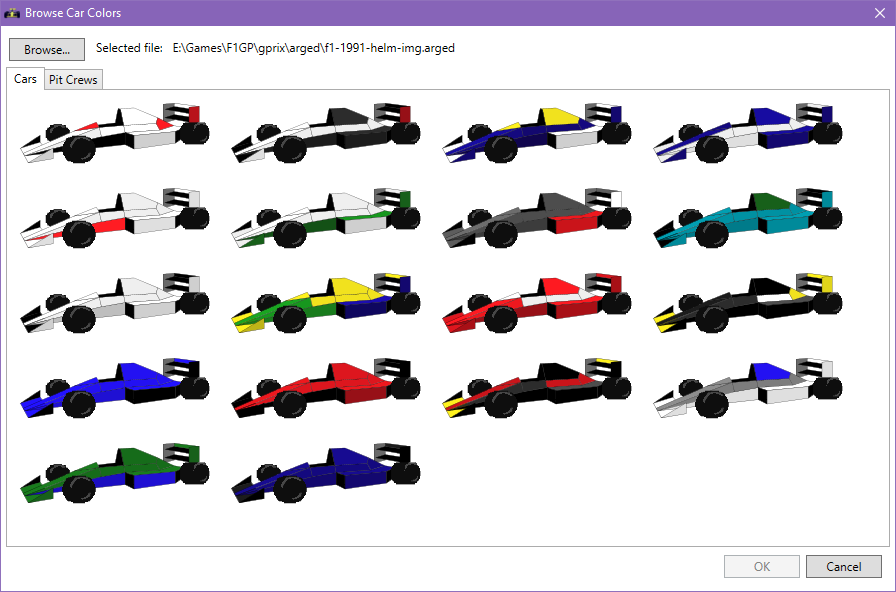
By clicking on one of the cars or pit crews and then clicking OK, you will paint the currently selected car or pit crew with the colors of the selected item.
You can paint all cars, including those that belong to teams that have no active drivers. However, a team with no active drivers will not appear in the game. One area of usage could be if you want to include an alternative paint job in your car set, for example.
Helmets tab
Here is where you paint driver helmets.
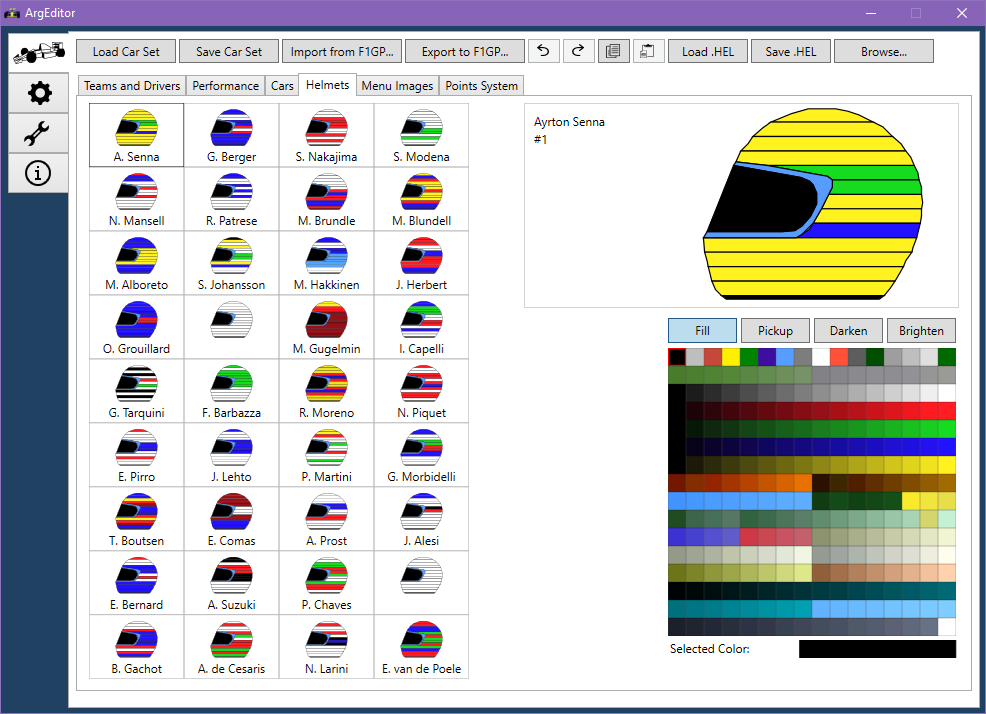
The selection and painting works in the same way as in the Cars tab, see the palette tools page for more information.
By right-clicking on a helmet in the list of helmets on the left, a context menu appears. It has three actions:
- Copy, which copies the selected helmet to the clipboard
- Paste, which pastes a helmet from the clipboard to the selected position
- Load .HEL File, which allows you to load a .HEL file from disk to update the selected helmet
- Save .HEL File, which allows you to save a .HEL file to disk containing the selected helmet's colors
These options are also available for the currently selected car in the toolbar above the tab.
To quickly choose helmet colors colors from an existing ArgEditor car set file, F1GP .EXE file, old F1Ed car set file (.1ED) or from a single .CAR file, you can click the "Browse..." button at the top. A new window will appear. By clicking the "Browse..." button in the new window, you can choose an existing car set, EXE file, 1ED file or CAR file to read existing car colors and pit crew colors from.
Once you have chosen a file, each helmet found in the file will be displayed.
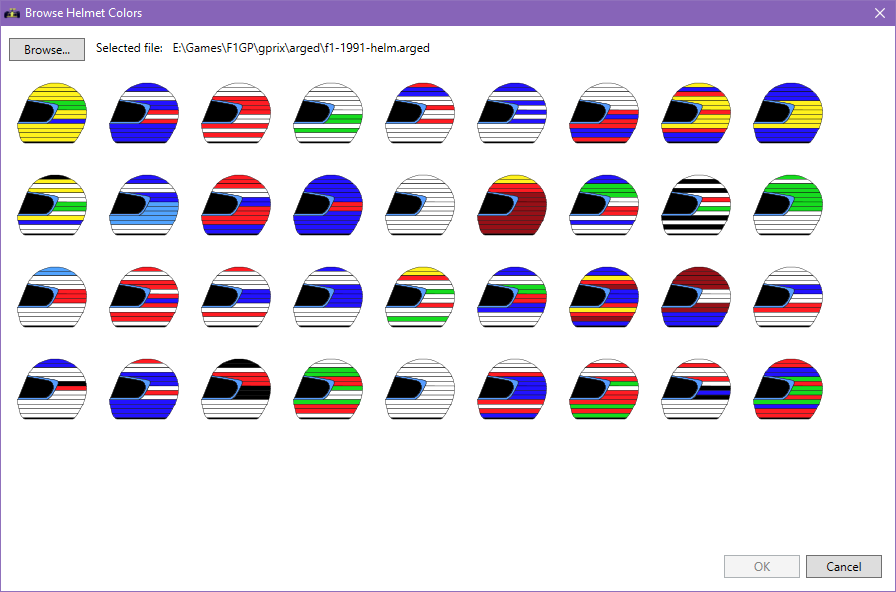
By clicking on one of the helmets and then clicking OK, you will paint the currently selected helmet with the colors of the selected item.
You can paint all helmets, including those that belong to drivers that are not active. However, an inactive driver will not appear in the game. One area of usage could be if you want to include an alternative paint job in your car set, for example.
Helmets behaving differently
Presumably for optimization reasons, some helmets in the game have fewer colors available to them. Helmets for drivers with #13, #15, #36, #37, #38, #39 and #40 will always have the same color for the bottom two-thirds of their helmets. The only driver this affects among the default drivers is #15 Mauricio Gugelmin, who has a helmet that is mostly dark red anyway.
However, if you use a decompressed EXE these limitations go away.
When editing one of these helmets, a message will be displayed, reminding you that it will not export in the way you have painted it unless you are using a decompressed EXE file.
Menu Images tab
The menu images tab allows you to update the images that are displayed in the driver selection menu.
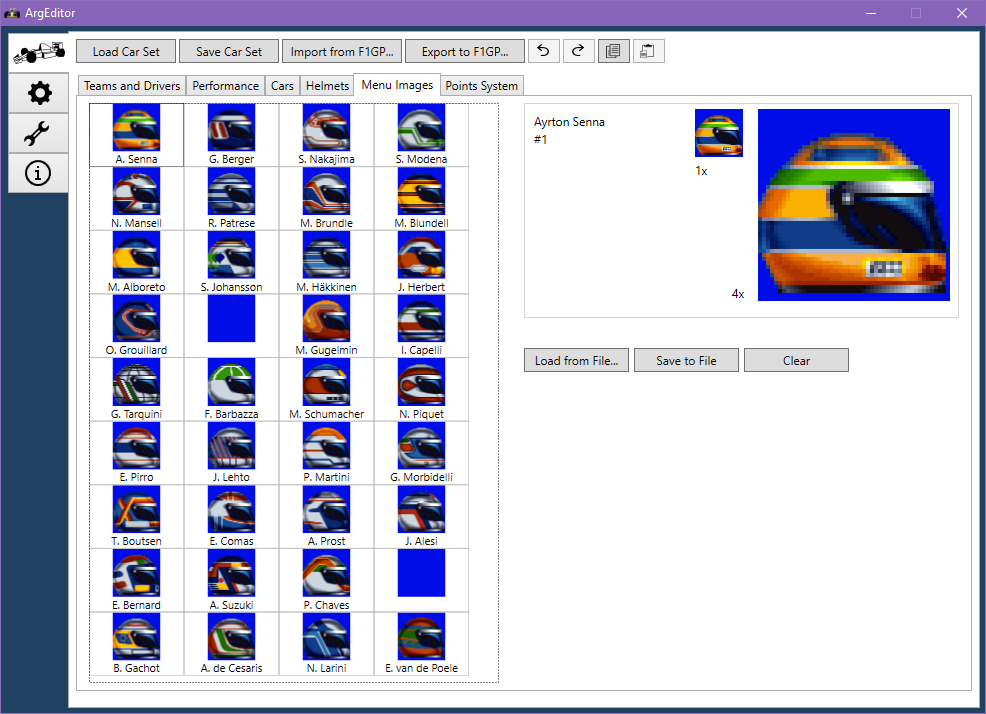
If you want to update the image for a specific driver, click on the menu image for the driver on the left-hand side and then the "Load from File..." button on the right.
A new dialog will open where you can "Browse" your file system for an image that you want to select.
When you have selected the image, ArgEditor will scale the image to 48 by 48 pixels and map the colors to the available palette. You will then be presented with a preview of the result.
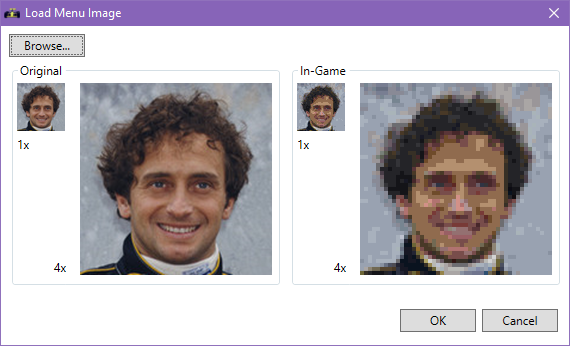
If you are happy with how the image looks you can press OK and the image will be updated.
Note: For technical reasons, the first time that you do this after starting ArgEditor, the image processing may take a bit of extra time
You can save an individual image to disk by using the "Save to File" functionality.
By clicking "Clear" you will reset the image to a blank dark blue background.
Menu image tips
It is recommended that you use some form of image editing software to make sure that the image you have selected is as square as possible to avoid squashing. This is because of the fact that the game only allows 48x48 images, so ArgEditor will always fit the entire image into a 48x48 square.
Points System tab
This is where you set the number of points each finishing position scores for the championship.
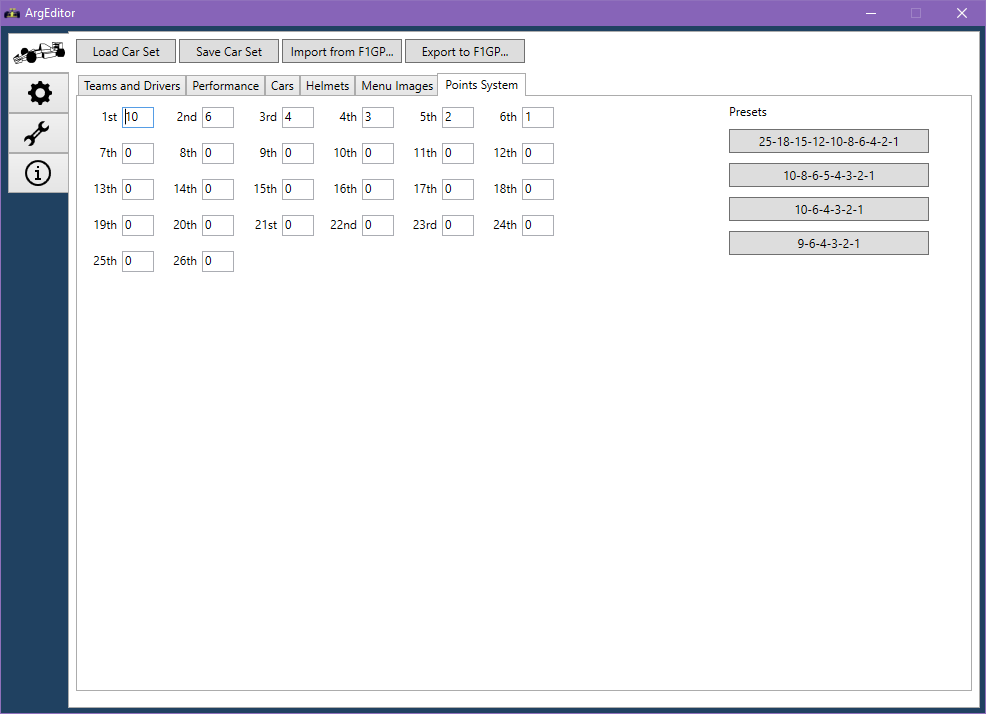
You can edit the number of points scored for each finishing position, from 1st down to 26th. However, to award points to finishers in position 7th to 26th you need to use a decompressed EXE.
The maximum number of points that a finish can score is 255. Another thing to note is that drivers that do not finish the races do not receive any points at all, even if the position they end up in would have been a scoring one.
On the right is a number of buttons with presets for the F1 points scoring systems used since the beginning of the 1960s. Click on a button to update the screen with the specified system's points.
If you award points to positions 7th to 26th, a message will appear that informs you that they will only be available if using a decompressed EXE file.
I have finished my car set, now what?
After you have created the car set you can save it to disk and share it with your friends or the rest of the community.
But of course, you probably want to export the car set to a GP.EXE file of your choice to try it out in-game!